
In a recent dental publication, Dr. Jack Turbyfill (a reputable and prominent prostodontist and lecturer on complete and partial dentures), was being interviewed by another dentist. I believe it is worth repeating some of his thoughts. “Expert partial technicians are becoming a rarity today. If the dentist has an exceptional removable technician, he or she has to learn how to keep that person because this is one of the biggest shortages we have today in dentistry”.
As president of the Flexite Company I am privileged to meet with technicians from all over the world. There is a shortage of skilled partial technicians in every country. Dentistry today is more focused on implants and mouth reconstruction. New technicians strive to become porcelain or crown and bridge specialists because they are assured of a higher income. This may be true but there is still a great demand for removables. Where are we going to get these removable technicians from? Adjustments may have to be made in salaries to the technician and higher wages and lab fees will have to be increased to the dentist proportionately. As Dr. Jack Turbyfill said, “Expert partial technicians are becoming a rarity today”.
Now that cast flexible partials are popular and in demand, it is more imperative than ever to train technicians to become expert partial technicians. We must teach them to properly survey and design partials. Many labs enter into this modality without adequate training in surveying and blockout procedures. Some do not own a Surveyor and continue to eye ball their clasps. Flexible partials require the same skill as cast metal partials. Surveying, blockout, duplicating models, etc. are essential steps in fabricating cast partials whether they are cast metal or cast thermoplastics.
Surveying, Art or Science?
Every removable restoration must have a path of insertion. Every oral cavity can be compared to fingerprints. They are all different. Shapes of teeth vary from ovoid, tapering, to square. Sometimes they are a combination of each. Some teeth are malposed and flare out in opposite directions making the insertion of the restoration difficult. This creates added problems if we wish to keep the clasps near the gingival, for esthetic reasons, and the survey indicates otherwise.
What do we mean by survey? Think of a globe. (Sketch A)

It is perfectly round and the perimeter is 360 degrees. If we put it in a fixed position and run a perpendicular carbon marker around the globe we will be marking the widest part of the globe. (180 degrees) Anything below the line would be into an undercut. If we tried to create a cover for the globe, we could only succeed in bringing it to the widest point. It would be impossible for the cover to go below the widest part of the globe. It is the same when we apply the carbon marker to the widest portion of the tooth.
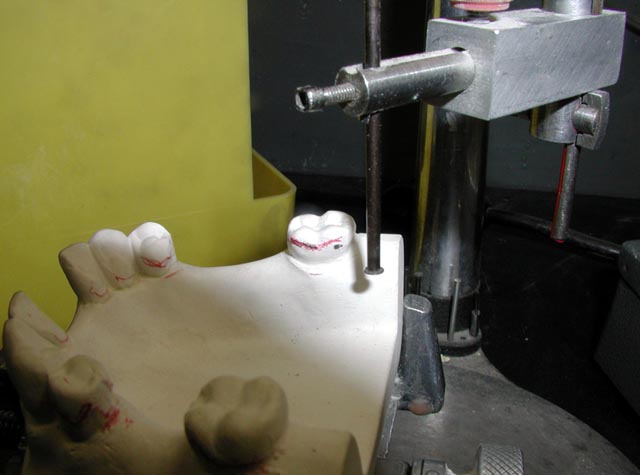
Figure 1 Show the survey on a lower sample model. The red mark indicates the widest part of the tooth showing the undercut gauge and point of reference where the flexible third of the clasp will engage the undercut.

Figure 1
Function of a Clasp
On a removable partial denture, the clasp acts as a direct retainer and/or stabilizer for the prosthesis by partially encompassing or contacting an abutment tooth. The clasp has to be strategically designed according to the survey so that insertion and removal of the appliance is without stress to the abutment teeth and it is retained firmly.
The clasp can be divided into 3 parts: the shoulder 1/3, the middle 1/3, and the flexible 1/3.
(Sketch B)
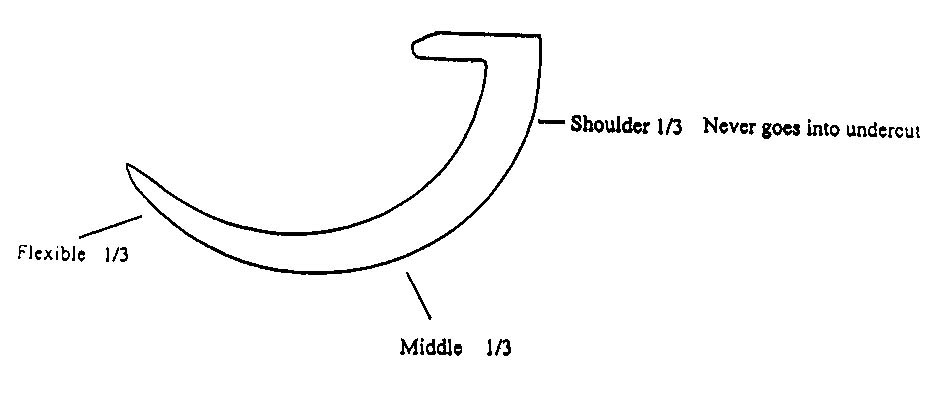
Under no circumstances is the shoulder 1/3 put into an undercut. The case will not seat. The middle third can begin going into an undercut area if the buccal slope is gradual unlike some buccal areas that are round. The flexible 1/3 is placed into the undercut determined by the undercut gauge.
Creating Path of insertion
We create our own path of insertion when we set the model on a base that can be manuvered in different directions. Initially, we set the teeth to be clasped in the most upright position with the long axis of the teeth perpendicular to the floor. Priority is given to the most anterior tooth clasped as they are the most visible. Technicians can influence the designs by changing the tilt to favor anterior teeth. When feasible, tilt the model so that the survey line is in the lower 1/3 of the tooth. On distal extension cases, tilting the free-end saddle upward to reduce the undercut on the distal of the bicuspid will bring the survey down lower and result in an esthetic restoration.
(Sketch C)

An undercut gauge is used to help the technician locate the area where the clasp can be placed for retention. The undercut gauge has a tip that protrudes approximately a millimeter horizontally. It measures the depth of an undercut and is strategically placed in the flexible 1/3 of the clasp.
A lingual view of the molar Figure II shows the survey in red, the undercut gauge and the point of reference where the flexible third of the clasp engages the undercut.
Figure II
A completely designed and blocked out model. Figure III
Buccal retention is obtained on pre-molars #20 and #28 and
lingual retention is obtained from both molars #18 and #31.

Figure III
Completed partial.
Figure IV Below

Figure IV
Where to Place a Roach Clasp
Starting from the center of the buccal, draw a line through the long axis of the tooth.
Figure V below
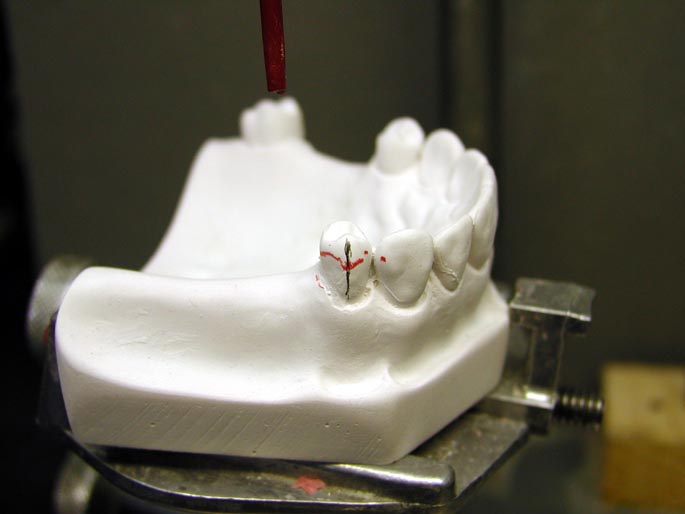
Figure V
Find the two points of reference with the undercut gauge.
Connect with pencil and determine the top of your roach clasp.
Note: This applies to cast metal partials as well.
Figure VI below
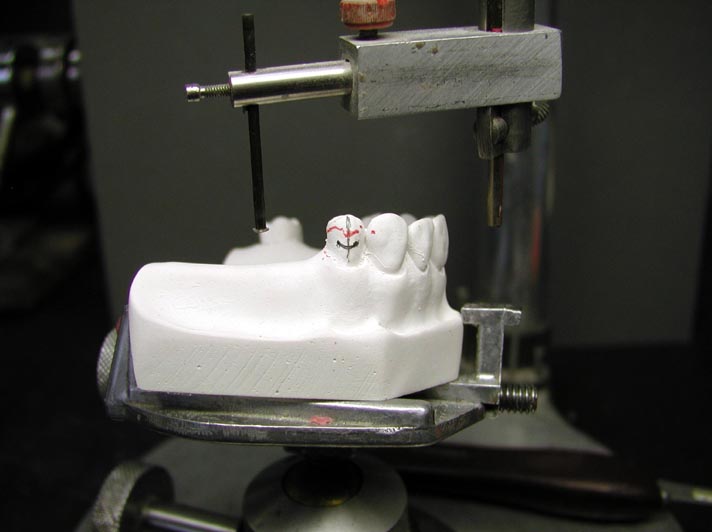
Figure VI
View of waxed roach clasp. Figure VII below
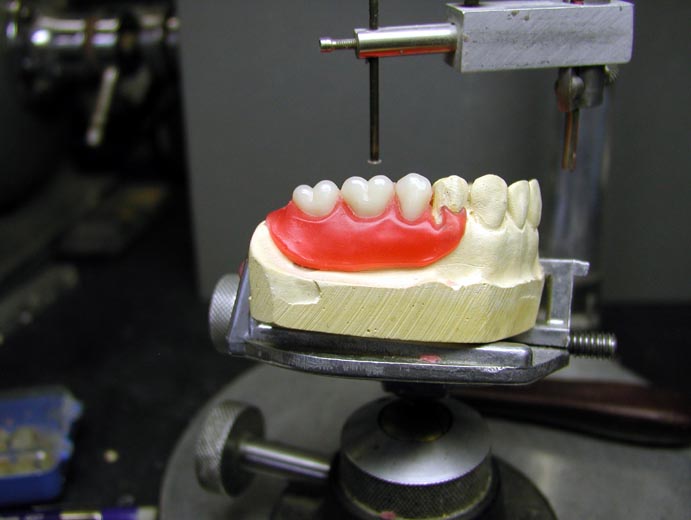
Figure VII
View of a completed roach clasp on a lower partial.
Figure VIII below

Figure VIII
Note: I clasps can be surveyed in mesial or distal areas using the same technique.
Blocking out All Undercuts
When you survey the teeth, be sure to survey the saddles too. Highlight undercuts with a pencil and block out all undercuts below the pencil and block out all undercuts below the pencil line. If there is a lingual plate, the lingual undercuts on the teeth should be relieved as it comes around to the clasps. Figure IX
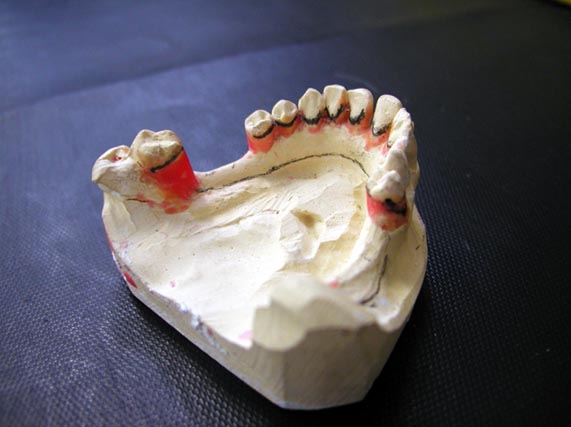
Figure IX
It does not matter whether the restoration is metal or plastic, no patient can tolerate the insertion of a dental appliance that goes into an undercut. This creates unnecessary pain, adjustments and visits to the dentist. Unnecessary adjustments may compromise the retention and ultimately lead to failure.
Surveying and designing partials is both an art and a science. The same partial can be designed in different ways. The palatal areas can be drawn more artistically by one lab than another. Most labs will use the conventional “C” clasp while other labs will utilize “I” clasps and roach clasps for maximum esthetics. Skills vary according to the artistic ability of the technician. The ultimate goal is to deliver an esthetic partial that will seat well and can be removed without difficulty. There is a familiar clicking sound when the partial seats correctly, indicating that the clasps were put into properly surveyed undercuts. I would like to share this familiar sound with you.